
Mastering Manual Focus Lenses
Tips for Sharper Shots with Vintage Lenses

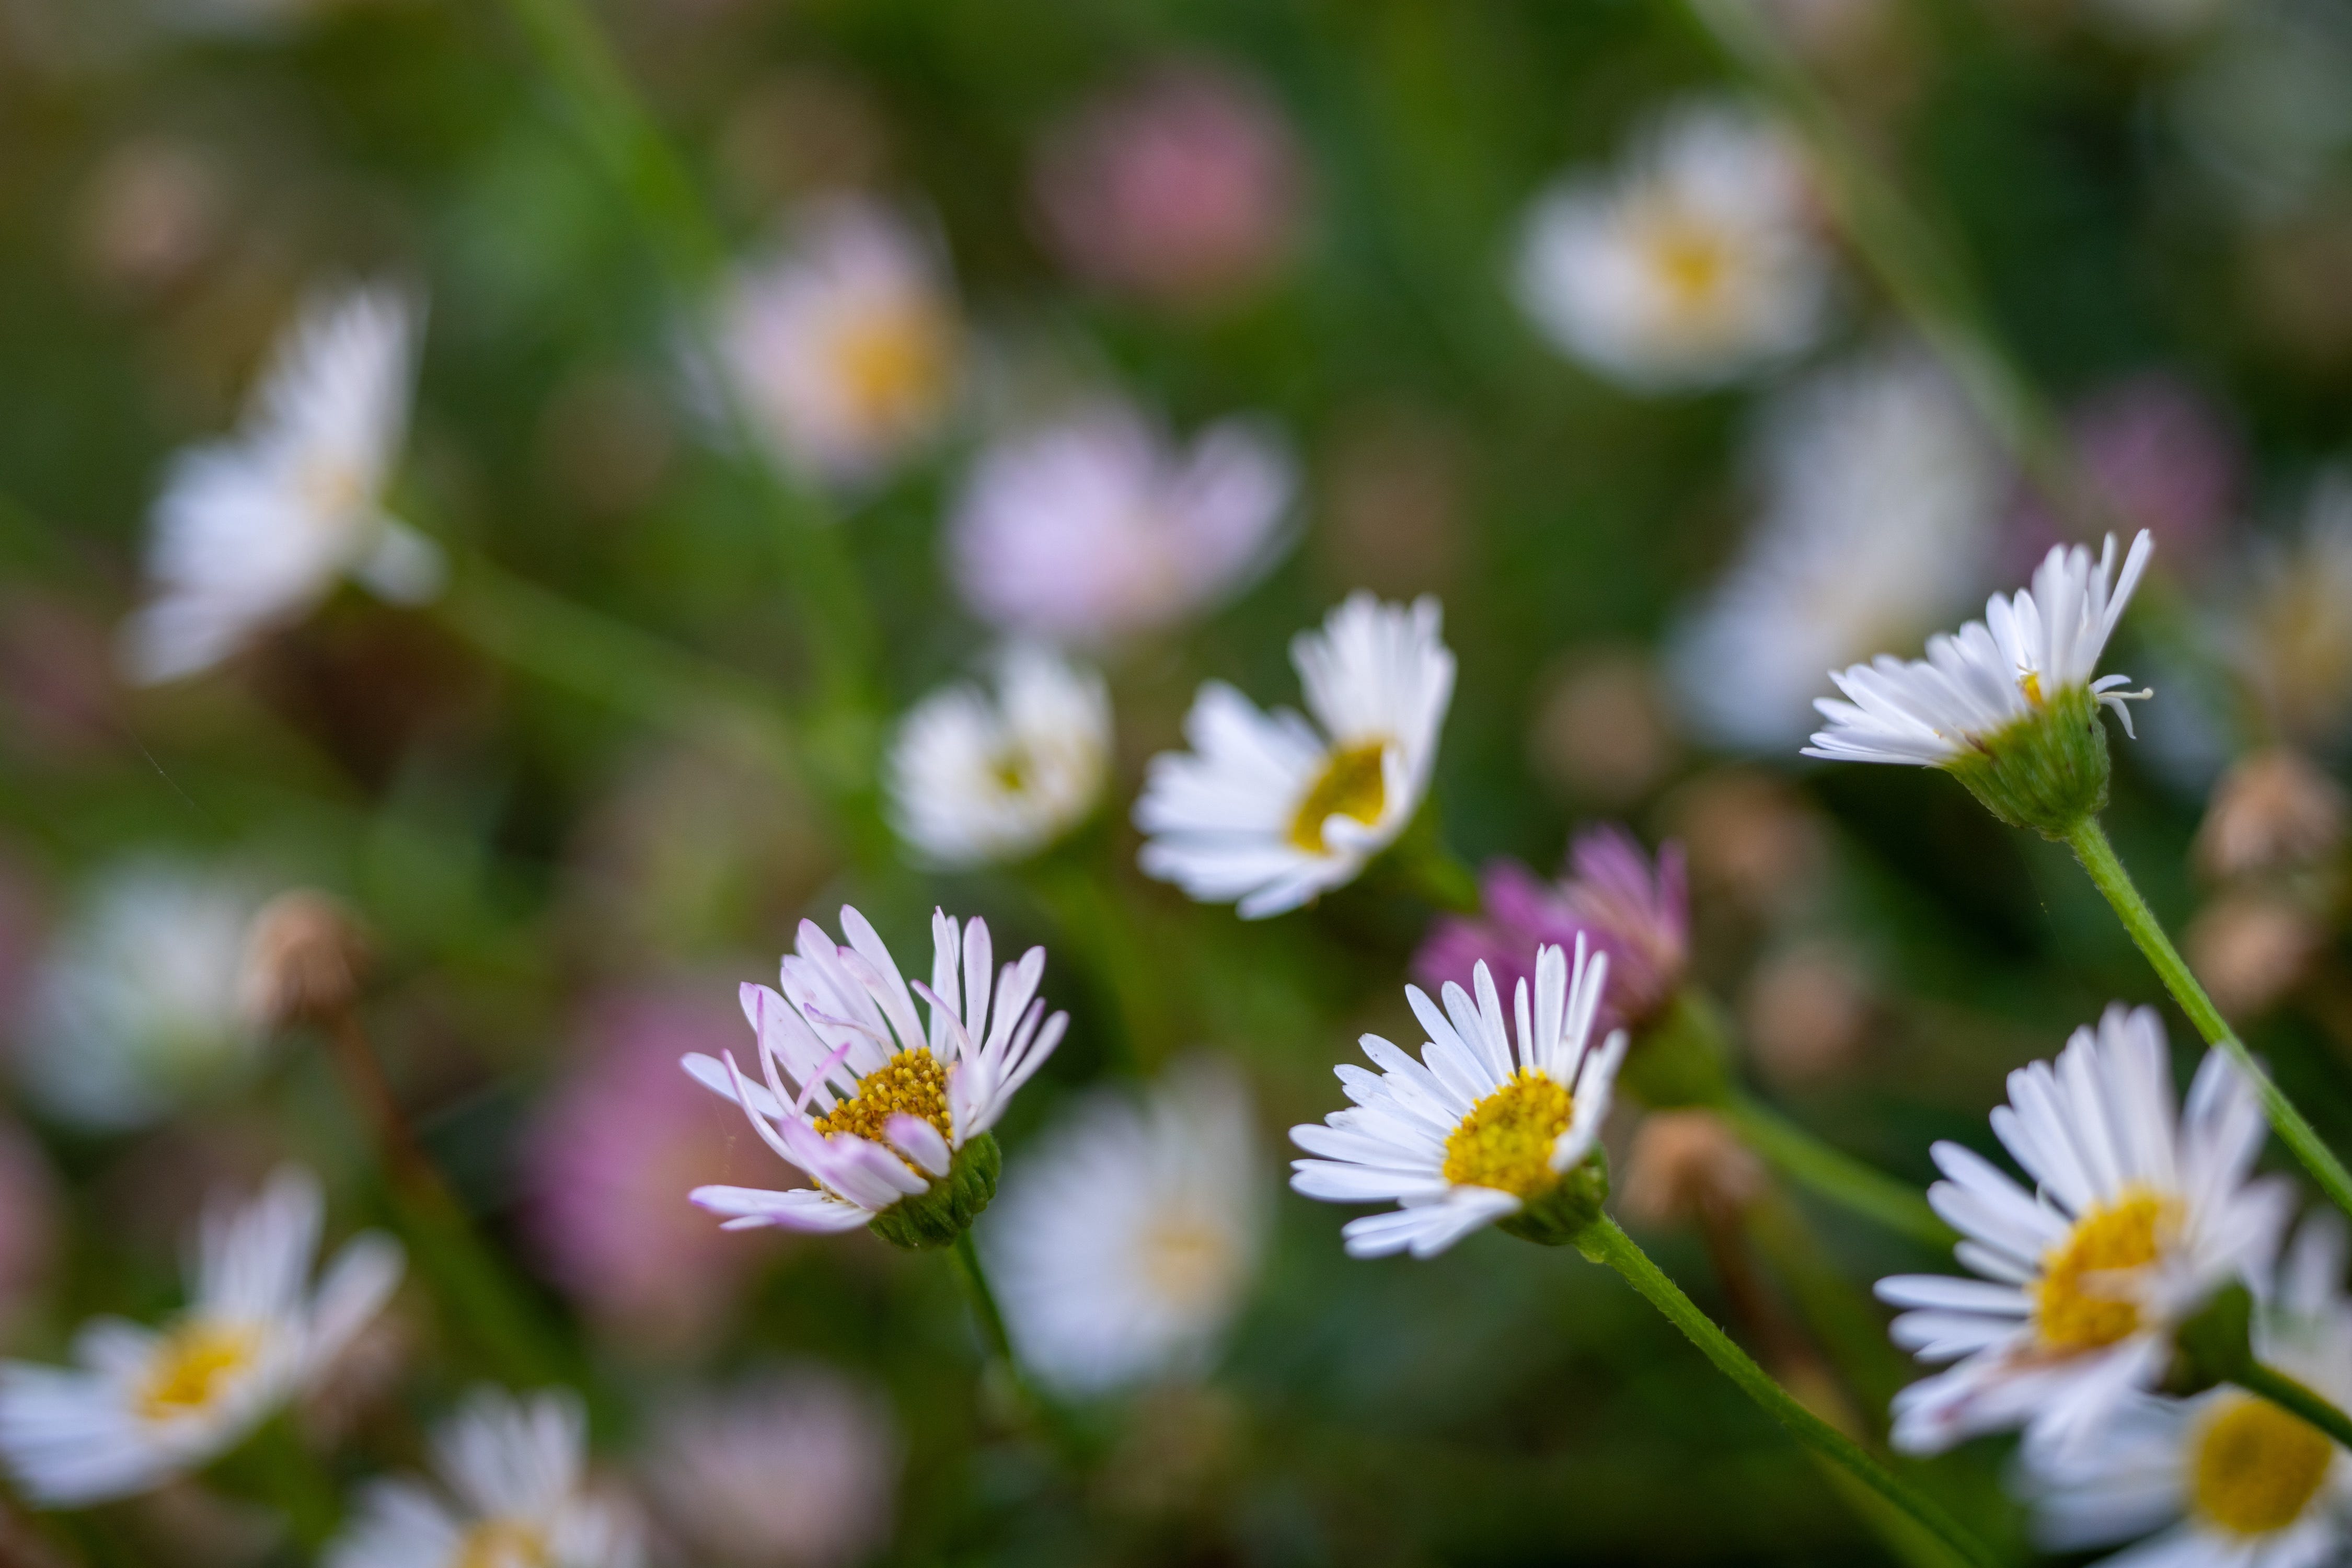
You get your first vintage lens and attach it to your digital camera - you convince the closest available family member to pose for you and begin to shoot. You’re expecting images with lots of character but when you get your shots back to your computer you instead find a lot of shots like this!

Shots with character - but annoyingly… just out of focus.
Last week, I tackled the most common question I get about vintage lenses: how to adapt them for use on a digital camera. This week, I want to take things a step further and dive into the experience of actually using them—specifically, the art of focusing with these classic manual lenses.
With the rise of autofocus technology in the late 1970s and into the 1980s—when cameras like the Minolta Maxxum 7000 (1985) brought autofocus into the mainstream—an entire generation of photographers has never needed to manually focus a lens.
Since then, autofocus has become so advanced and ubiquitous that the skill of manual focusing has gradually faded into the background, becoming a lost art for many.
Yet, as more photographers explore vintage lenses on modern digital cameras, they’re rediscovering the unique character, creative possibilities, and affordability these classic lenses offer.
Mastering vintage manual focus lenses isn’t just about nostalgia—it’s about regaining a deeper level of control over your camera and embracing a more intentional, thoughtful approach to photography.
However, the learning curve can be frustrating at first. You might miss shots, struggle to nail focus, and wonder if it’s even worth the effort. But with patience and practice, manual focusing becomes more intuitive, and soon, you’ll find yourself connecting more deeply with your subject and your craft.
If you’re new to manual focusing, here are some key tips to help you get the most out of your vintage lenses.
Note: I’m going to share some tips for focusing your manual lens - but also a few on getting sharp image. While these topics are related it’s probably worth saying that sharpness isn’t just about being in focus. Perhaps should go without saying - but I can just hear the comments - so thought it worth saying.
1. Understand Your Lens and Camera Setup
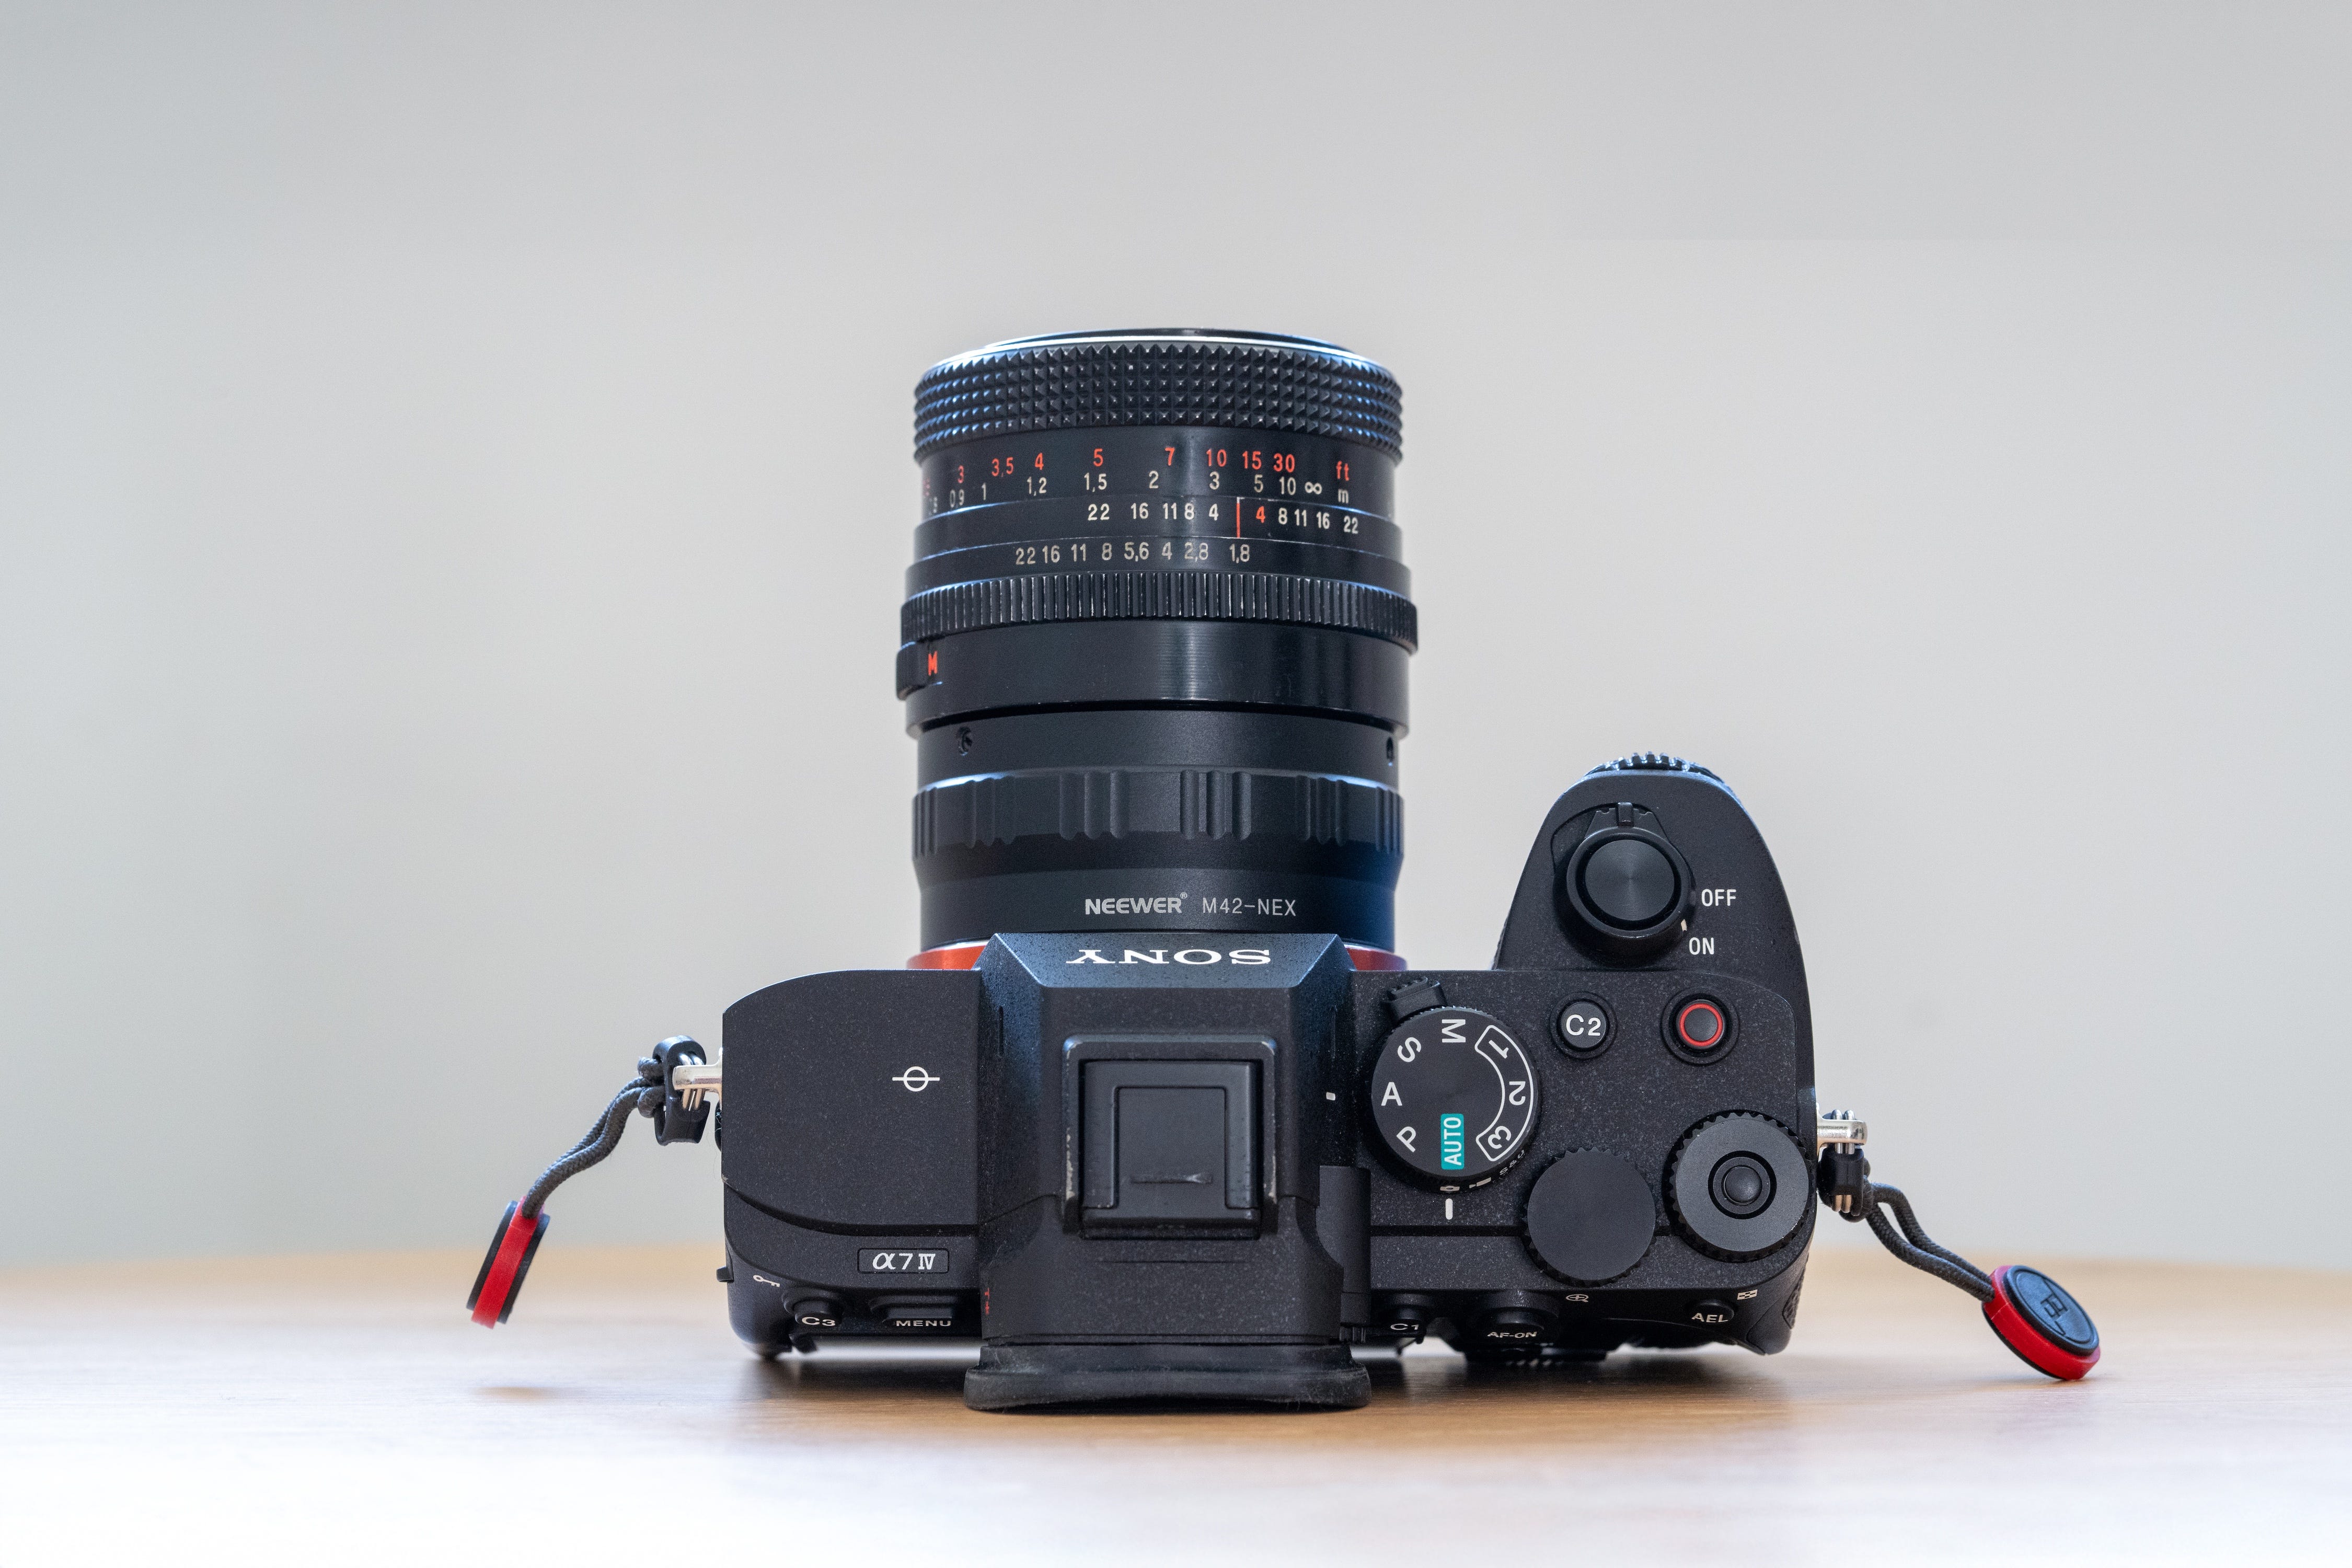
Before diving in, knowing your camera and lens is essential.
Each combination will be different. Some lenses have focus rings close to the camera and aperture rings further away, while others have them the other way around.
Some lenses will have long focusing ‘throws’ (the amount you need to turn the lens), which will enable you to really dial in and get precise focusing, while others will have short focus throws.
Some cameras will have focus assist features like focus peaking or magnification and may even let you map them to custom buttons; others will not.
It takes time to get used to using a camera and lens combination, and the best way to do so is to set aside time to shoot!
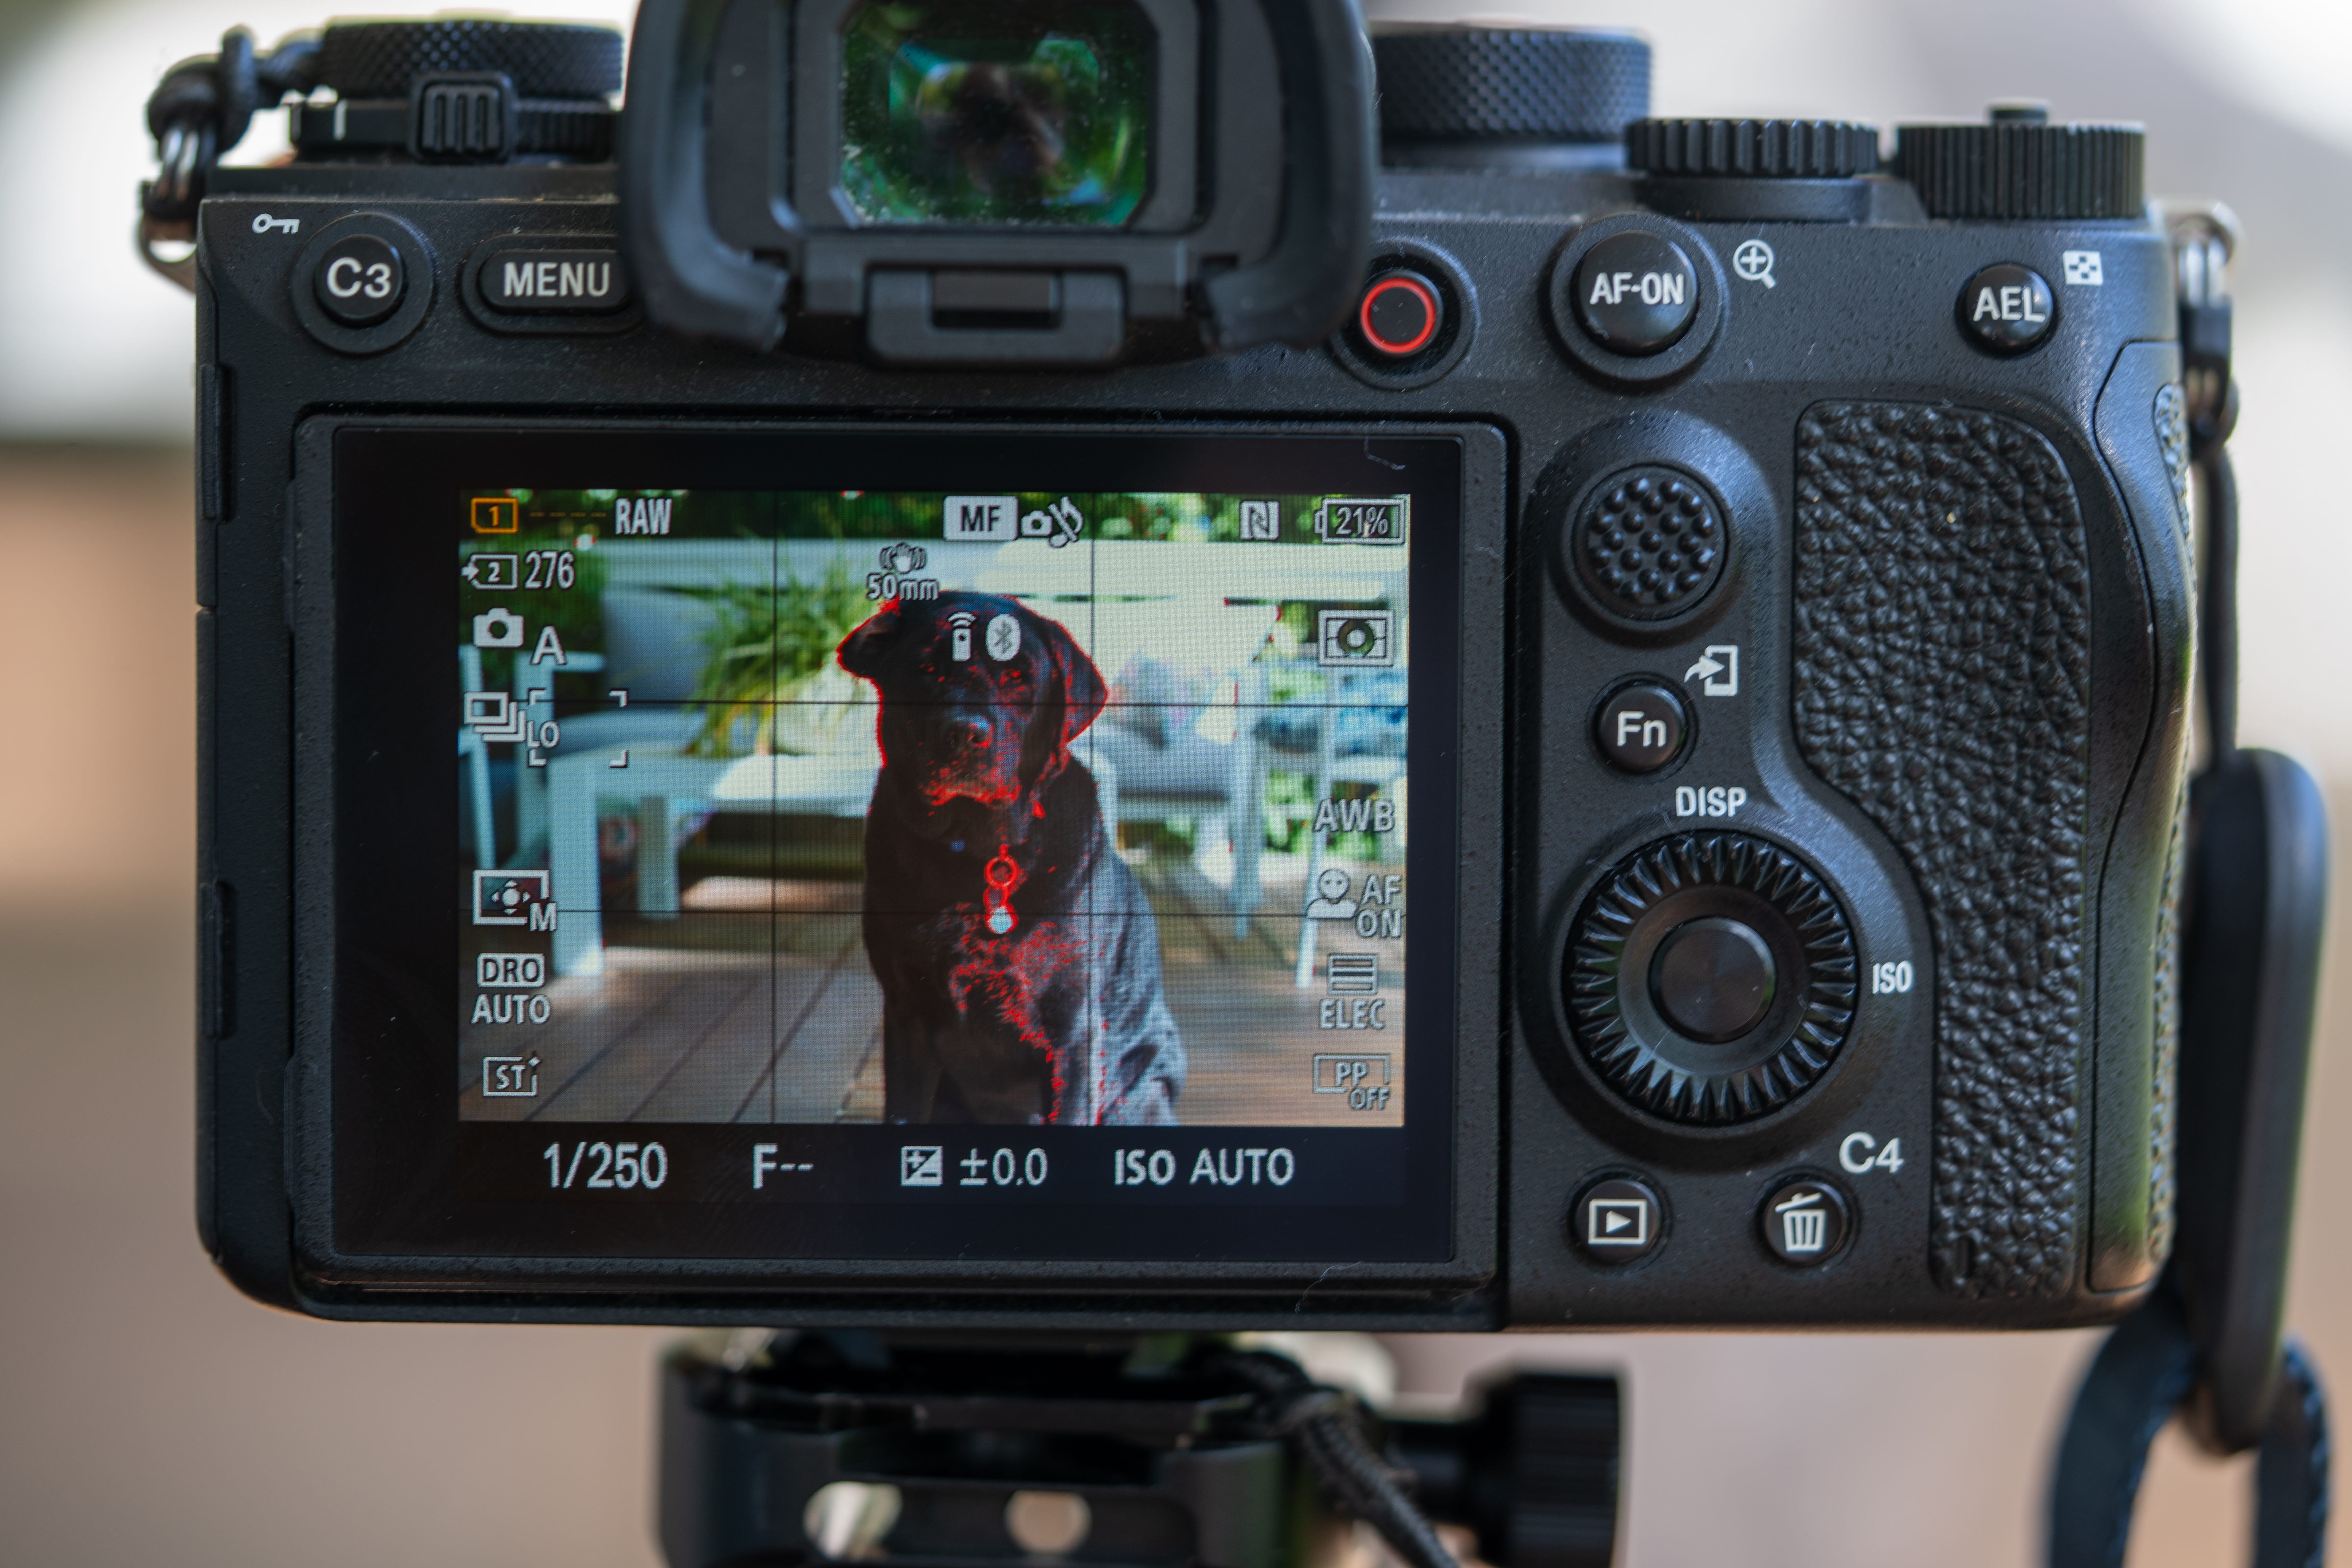
2. Use Focus Peaking for Precision
Most modern mirrorless cameras and some DSLRs offer focus peaking, highlighting the in-focus areas in a contrasting colour (red, white, yellow, or blue, depending on your settings). This makes manual focusing much easier, especially in good lighting.
To use it:
Enable focus peaking in your camera’s menu.
Adjust the sensitivity level to see a clear focus highlight.
Slowly turn the focus ring until the subject is outlined in the peaking colour.
I have mapped one of my Sony Alpha A1’s custom buttons to toggle focus, peaking on and off.
I typically have it switched off (as I prefer the following method I’ll talk about), but it is handy to switch this on quickly.
I don’t prefer to use it because the peaking colours and patterns cover parts of the image I’m composing—perhaps it is just me, but I find them a little distracting. I will only turn it on if I’m having trouble nailing focus with some of the following techniques.
3. Use Magnification for Fine-Tuning
If your camera has a magnification or zoom-in function, use it for precise focus, especially in portraits or macro photography.
This is my preferred focusing assistant on my cameras.
Activate the focus magnification feature (often a custom button on mirrorless cameras). This will give you a zoomed-in view of your camera, either in its Electronic viewfinder (EVF) or on its LCD.
Zoom in on your subject’s eye (for portraits) or main focal point.
Adjust the focus ring carefully to achieve sharpness.
Note: some cameras enable you to zoom in further and have higher-resolution viewfinders than others.
This is why I LOVE shooting with my Sony Alpha A1, which has a beautiful 9.44 million dot electronic viewfinder, which is a joy to use.
I have mapped one of my Sony A1’s custom buttons to trigger the Focus Magnifier, so as I’m lining up a shot, I simply hit that button, and in the viewfinder, I have a 4.2x zoomed-in view of what my camera sees.
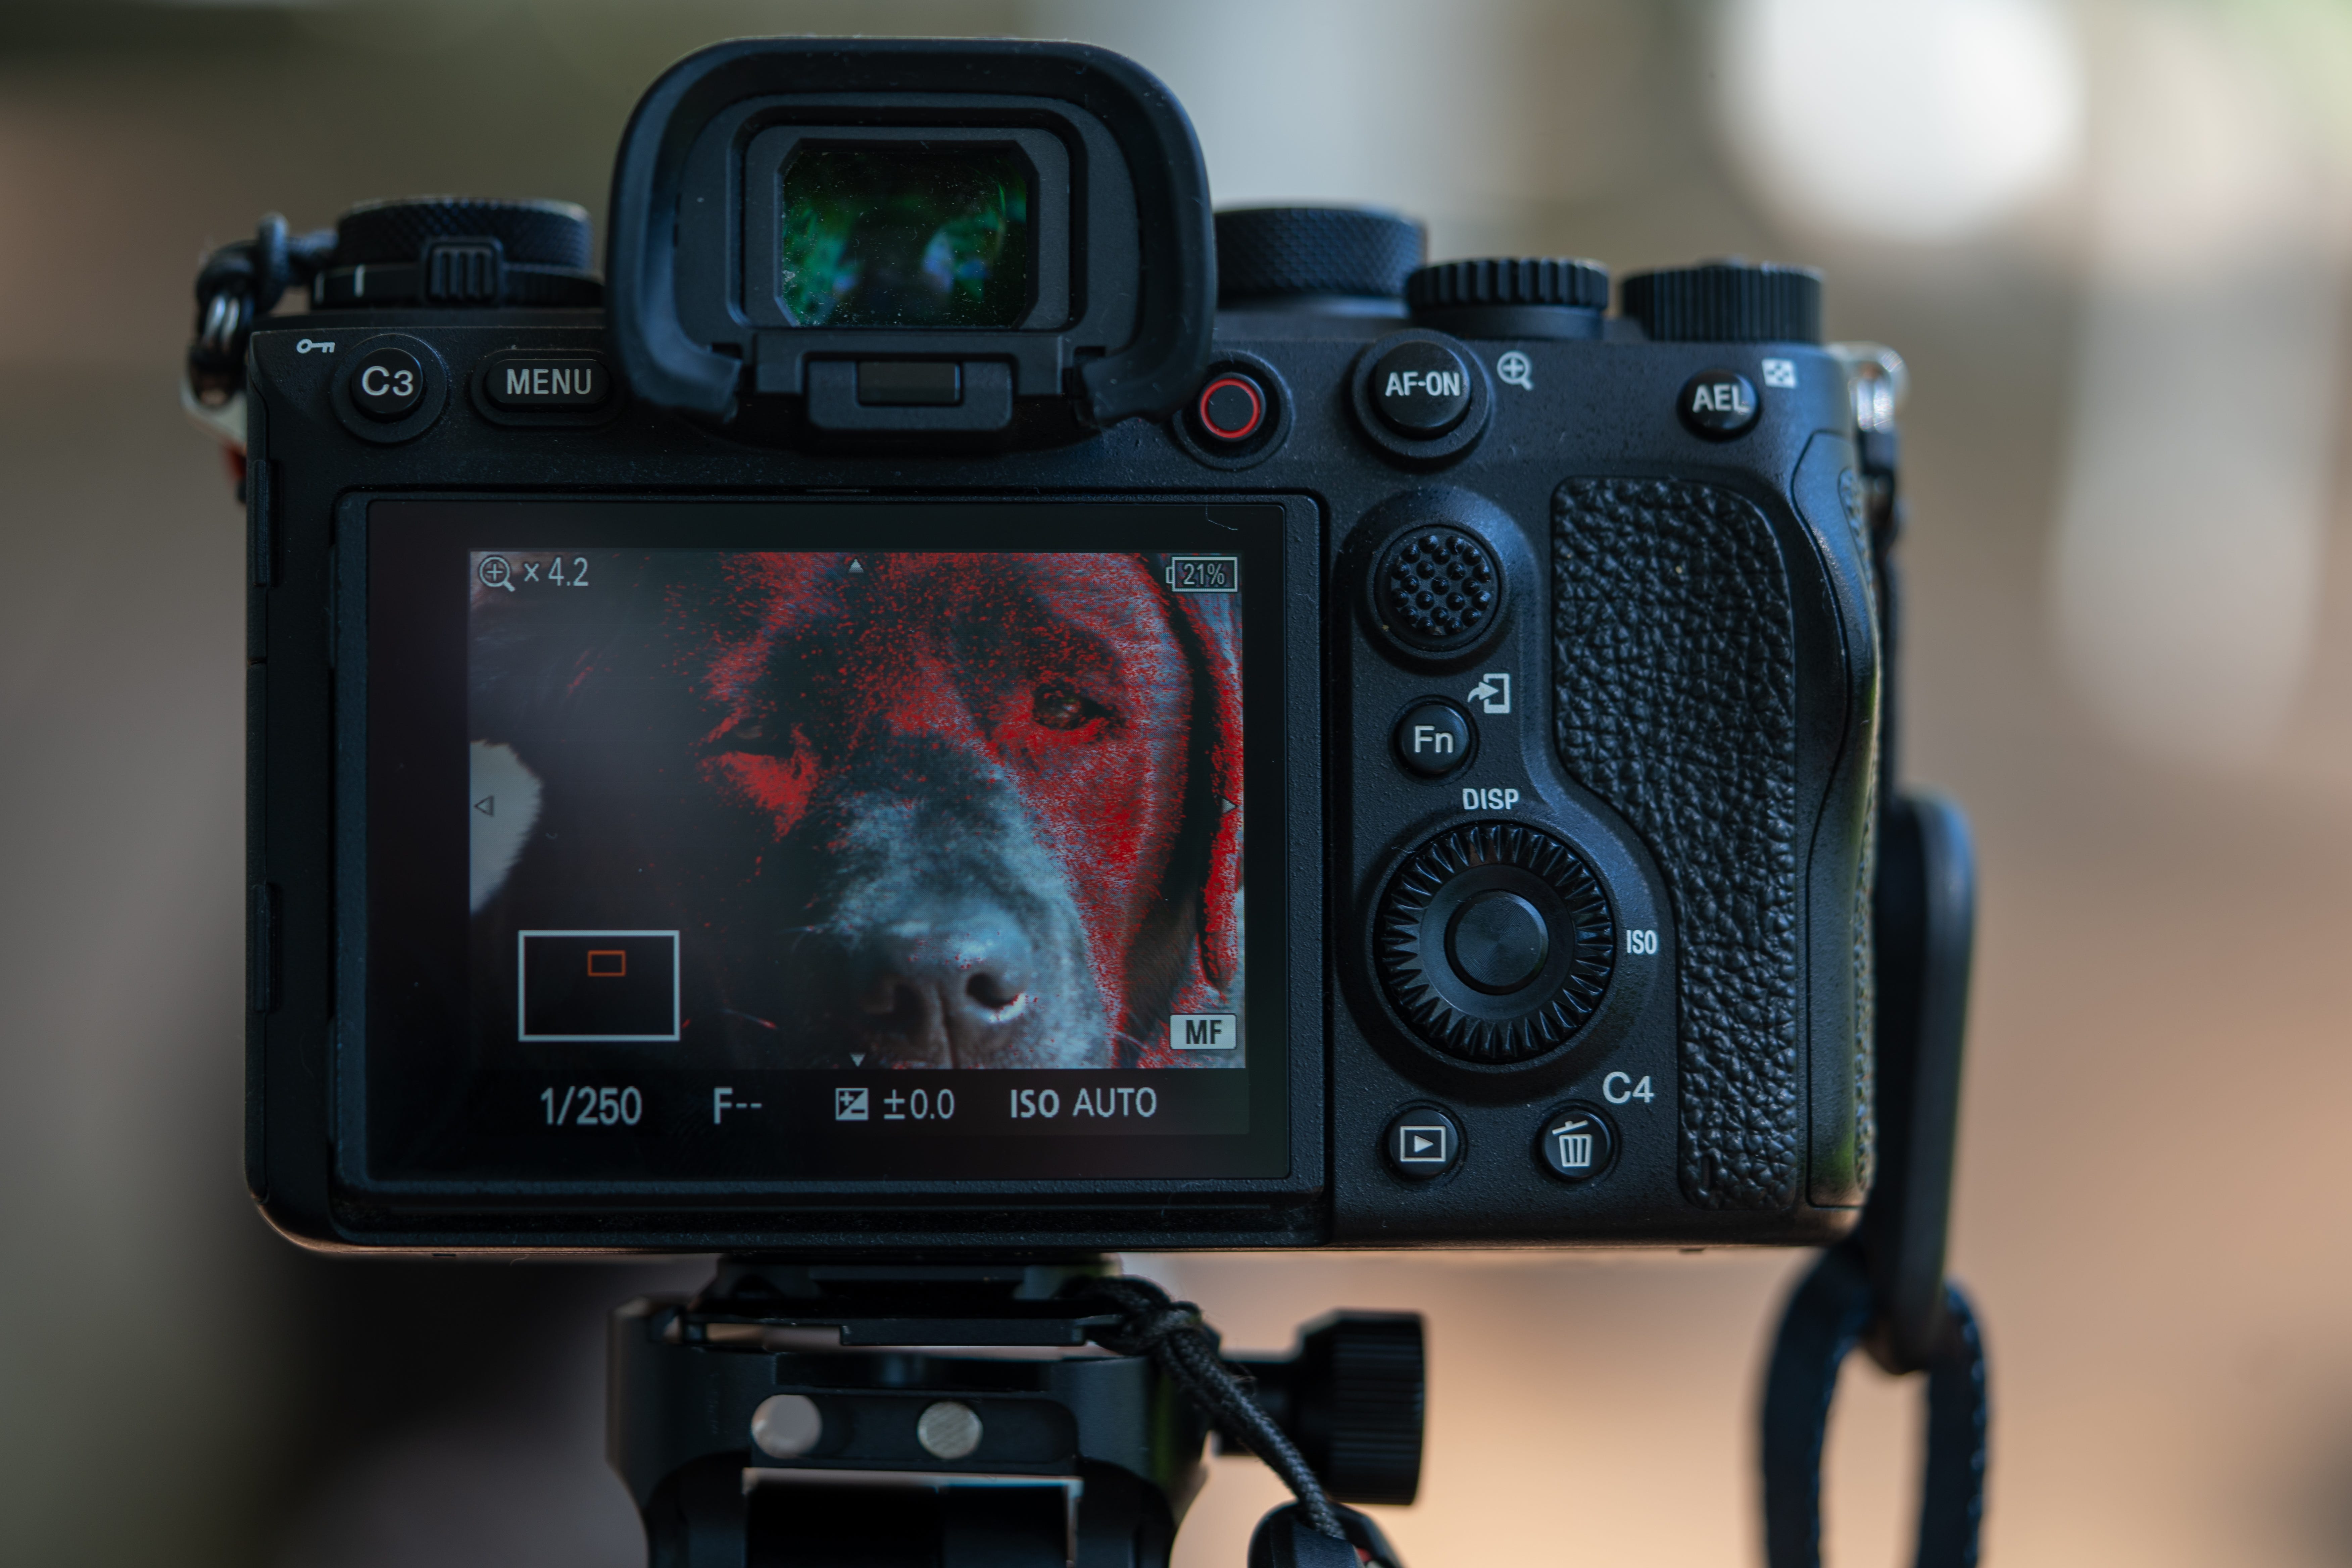
Hit the button again, and it zooms in further to 8.5x.
I can then use the joystick on the back of my camera to move the magnified area to the area I want in focus (e.g., the eye of a portrait subject) to check and adjust focus.
I find this to be such an effective means of focusing that I rarely use focus peaking.
4. Use Live View for Manual Focus on a DSLR
If you're using a DSLR or a mirrorless camera without a high-resolution EVF, you might find switching to Live View mode on your LCD:
Activate Live View.
Zoom in on your subject digitally.
Adjust the focus ring carefully until the image looks sharp.
I personally prefer to use the EVF on my cameras as I find the screen on the back of my cameras less precise than what I see in my viewfinder - but some older cameras and DSLRs will lead to this method being the way to go.
5. Shoot at Smaller Apertures for More Depth of Field
While many of us love to find lenses with large maximum apertures (smaller f/numbers) to create beautiful bokeh, the reality is that the larger the aperture, the narrower the depth of field and the trickier it is to nail your focus.
If you’re struggling to get in-focus images, try stopping down your aperture by a stop or two. This will widen the depth of field slightly, which gives you more of a chance of an in-focus shot.
You’ll also find that most vintage lenses have a ‘sweet spot’ where they give you the sharpest images with the best contrast—and this sweet spot is almost always NOT wide open.
Let me illustrate a lens's sweet spot by showing a series of shots taken with my Canon 50mm f1.2 LTM mount lens. This first shot was taken at f1.2 and has the narrowest depth of field.
The next shot is taken with an aperture of f1.8. The depth of field is getting a little wider, and we’re starting to get a sharper image of the words on the bottle.
Lastly, this sequence is taken at f2. Again, the bottle’s label is slightly sharper.
As the aperture changes, you will probably first notice a change in the background—particularly the size and shape of the bokeh balls. But if you look closely, you’ll see that the part of the table that is in focus grows (an increase of depth of field with a smaller aperture).
Closer observers will also notice that the sharpness of the words on the bottle increases, and this isn’t just due to the increasing depth of field but also the lens's sweet spot.
Here’s a cropped side-by-side comparison of the three shots, which I hope illustrates this a little better. In each image, I focused upon the B—but sharpness increases as the aperture is narrowed.
It’s worth saying that after f2, sharpness didn’t increase very much - so the sweet spot is probably around f2-f2.8.
The sweet spot will vary from lens to lens but is generally found somewhere a stop or two narrower than wide open.
6. Master Zone Focusing and Pre-Focusing

Zone focusing is a powerful technique that allows you to pre-focus at a set distance and wait for subjects to enter the focal plane.
This is especially useful for street photography and fast-moving scenes where manually adjusting focus in real-time is challenging.
This topic probably warrants an entire article at some point (and it’s a technique I’m still practising).
Set your lens to a specific focus distance based on the depth of field scale on your lens.
Choose a smaller aperture (e.g., f/8 or f/11) to increase the in-focus range.
Position yourself so that subjects naturally move into your pre-focused zone.
Alternatively, you can pre-focus your shot using something in the position you know your subject will be and wait until they move through the frame to that spot. That’s what I did with the shot above—I pre-focused on the tree to the right of the bike rider and waited for him to ride to that spot.
By practising zone focusing, you can shoot quickly and confidently without constantly adjusting the focus ring.
7. Use a Tripod for Stability
A tripod is usually used to keep the camera still and eliminate movement or shake. This is done to get sharper images, and it can also help with focusing.
For example, anyone who has photographed flowers (or any other kind of closeup or macro photography) knows that one of the trickiest things about shooting them is even the slightest change in distance between your camera and the subject.
This distance can change in one of two ways - either your subject moves or you move.
Perhaps I’m a little less steady than I once was. However, even when I try to be as still as possible, I find that I rock back and forth a little while I’m framing a shot - changing the focal plane as I do - a tripod can eliminate the camera moving - thus removing one of the two things that can change the distance between camera and subject.
Alternatively, stabilizing yourself by leaning against a wall or improving your technique for holding your camera can help.
8. The “Back-and-Forth” Method
If you don’t have a tripod and you find that you move back and forth while shooting, account for this by shooting multiple shots as you rock back and forth.
I do this when out and about shooting closeup photos in a garden or bushwalking and can’t take a tripod. I will switch my camera to shoot in a short burst while I intentionally move slightly forward and backward. There’s almost always at least one keeper in the burst.
9. Position your Subject Well
Lenses are almost always the sharpest in the centre of the frame. Vintage lenses are especially so.
Lens makers optimise a lens’s sharpness for the middle of the frame, as this is where most people frame their subject. The further from the middle you go, the less sharp the lens will typically become.

As a result, if you want something as sharp as it can be - somewhere in the centre is always going to be the way to go. This may feel like it limits your creativity a little, but once you get used to it, it can actually become a creative technique in your arsenal as you can position things you DON’T want to be in focus toward the edge of your frame.
9. Practice with Stationary Subjects First
Manual focusing is a skill that improves with practice.
Start with still subjects like:
Flowers and plants.
Architectural details.
Static portraits.
As you improve, set yourself some challenges to try different moving subjects.
10. Embrace the Slower, More Thoughtful Process
One of the best things about using vintage lenses is the intentionality they bring to photography. Autofocus can be convenient, but manual focus forces you to slow down, think about composition, and connect with your subject.
I remember shooting a portrait session with a Helios 44-M lens with a family member. The swirly bokeh in our shooting setting was beautiful, but nailing focus at f/2 that day was a challenge.
The temptation that day was to switch to an auto-focus lens. The shoot would have been quicker and perhaps more manageable for me as a photographer and for my subject - but I decided to lean into the slowness of the shoot.
I found that by going slow, I had more time to engage with my subject. As we went, he relaxed more and more, and the result was a series of intimate, well-composed portraits that felt far more personal than my usual work with autofocus lenses.
The process became part of the art, making me appreciate each frame even more.
Final Thoughts on Improving Manual Focussing
Using a manual-focus vintage lens on a modern digital camera can be incredibly rewarding. While it requires more effort than autofocus, the control and creative possibilities make it worth the challenge.
With practice using some of these techniques, you’ll find that your focusing will speed up and become more natural—and hopefully, you’ll see an improvement in your shots!
I’d love to hear about your experience on this topic. What focusing tips would you give someone with their first manual lens? What have you found most helpful as you make the transition to shooting with manual focusing vintage lenses?
Being old enough to remember when Louis Daguerre was still giving online classes in photography, I grew up with nothing but manual focus. I have tried many of the tips you mention here, with my digital camera(s), but I find that looking through the viewfinder and knowing what I am doing is MUCH faster. If my camera is on sticks, I never take the time to set up my camera for focus peaking, I just focus and shoot.
Having said that, my vision is good enough to allow for the old ways. If I get to a point where I can no longer accurately find focus bye eye, then I will spend the time looking at my screen. I would say that, after knowing how to manually focus, should come the knowledge of WHERE to place your focus; that is a heartbreaking story of love and loss, all by itself.
Great article!
I learned about how to preset my lense for whichever best f-stop to infinity from a photo instruction book way back when I started out.
Please look up “HYPERFOCAL DISTANCE”
Never used my camera without setting hyperfocal distance on my lense before setting out……that way I could take grab shots that were always in focus.
Setting each lense to its hyperfocal distance, and then repeating your tests may reveal the descrepencies between your lenses and camera.
Another note…..the more plates or leaves on the aperture in each lense usually indicates more precision in the lense ability to achieve a more accurate aperture.
Cheers